Paginated reports began under SQL Server Reporting Services (SSRS) as part of Microsoft’s previous BI stack. These reports are saved in an RDL file format and are typically used for operational reporting, often delivered as PDFs emailed to users on a daily or weekly schedule. This older Microsoft BI stack included SQL Server Integration Services (SSIS) for ETL processes, SQL Server for data storage and SQL Server Analysis Services (SSAS) for modeling data.
Power BI was introduced as a visual analytics tool to enable rapid, ad-hoc data exploration focused around visualizations. These files are saved in a PBIX file format. As the platform has matured, the desire has risen to integrate the RDL file format into the same platform so that organizations can consolidate their BI platforms. Microsoft has now enabled that capability with the Premium license of Power BI.
We provide the options for purchasing Power BI Premium along with the steps needed to create, publish and set up email subscriptions for paginated reports in Power BI service.
Purchasing Power BI Premium capacity
To create Power BI paginated reports, you first need a Power BI Premium workspace configured. You can skip the next two sections if you already have access to a Power BI Premium workspace.
There are two different ways for organizations to purchase Power BI Premium for Power BI.
The first, and most common, way to add premium is by purchasing P1, P2 or P3 capacity from the Microsoft Office 365 portal.
To do so, navigate to Power BI service → Admin Portal → Capacity Settings → Power BI Premium tab → Purchase. This will purchase Premium capacity, which is available 24×7.
NOTE: Depending on your overall Microsoft license agreements and any cloud service providers your organization uses, the process may vary slightly after that point.

The second option is used if you only need premium capacity for a short time, such as when you’re evaluating Power BI Premium or in a dev or training environment. In this instance, you can purchase Power BI Premium for temporary use via an Azure resource.
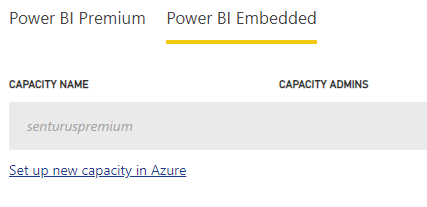
To do so, navigate to Power BI Admin portal → Capacity Settings → Power BI Embedded tab → Set up new capacity in Azure. In the Azure portal, you will setup the desired capacity. You will need A4, A5 or A6 to run paginated reports. These align with the resource levels for P1, P2 and P3 you would purchase from Microsoft Office 365. Pricing is slightly higher, but the resource may be started and stopped as desired.
Workspace setup
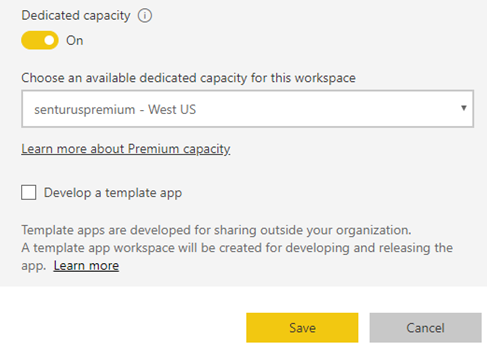
After your organization has purchased premium capacity, you then need to assign one or more Power BI workspaces to this dedicated capacity. If you are creating a new workspace, navigate to the Advanced section, toggle on Dedicated Capacity, then select one of the capacities you purchased above.
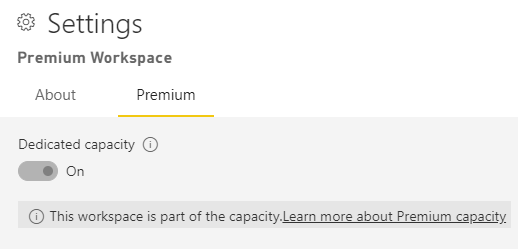
After a workspace has been created, toggle it to use dedicated capacity from the workspace Settings → Premium tab.
Premium workspaces are clearly denoted in Power BI service by a diamond indicator after the name:

Building your first paginated report
Now you’re ready to build your first paginated report.
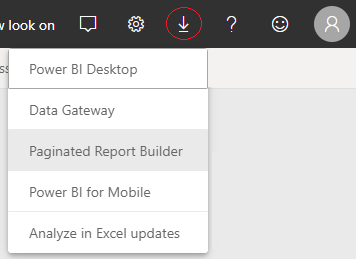
- First, download and install the Paginated Report Builder desktop application. The download link can be found from inside Power BI service under Downloads → Paginated Report Builder.
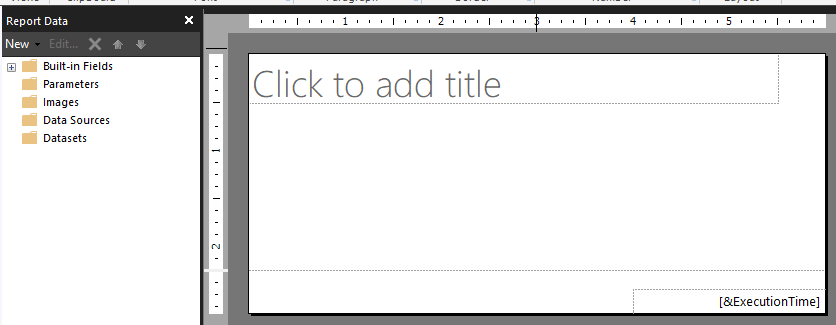
2. After install, open the Power BI Paginated Report Builder application on your desktop. Start with a blank report.
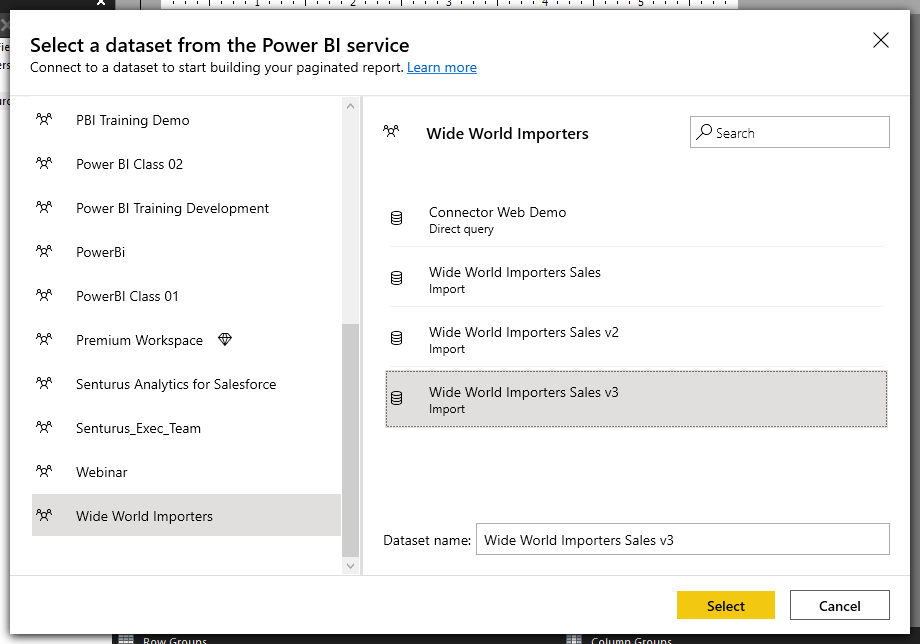
3. Next, create a data source. For this example, we’ll select Add Power BI Dataset Connection…, which will allow us use already published Power BI datasets.

You can then select any published Power BI dataset, even those in non-premium workspaces. In our example, we’re using a Wide World Importers dataset that we already published under a non-premium workspace.
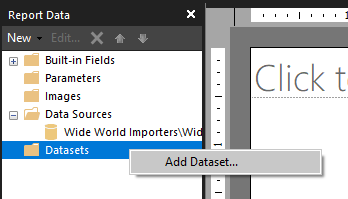
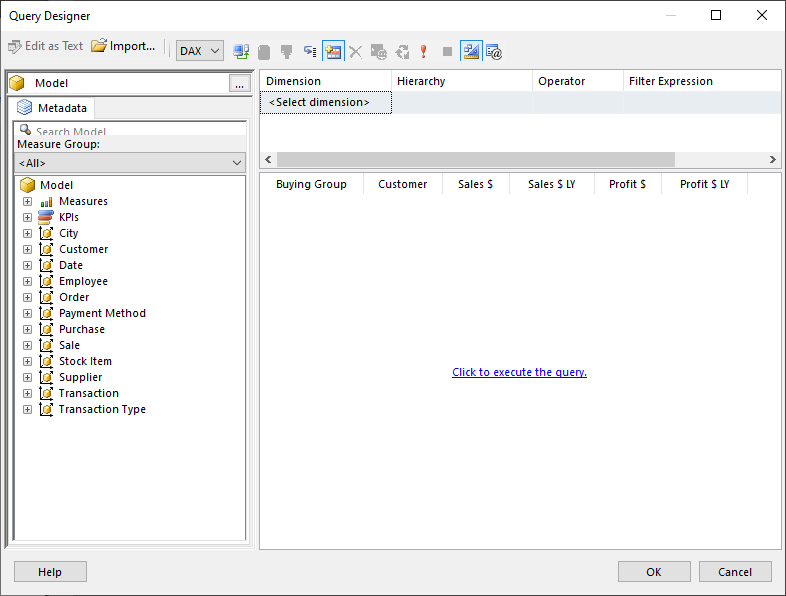
4. Next, we need to create a query against that data source by choosing Add Dataset, selecting the data source and using the Query Designer to build a query.
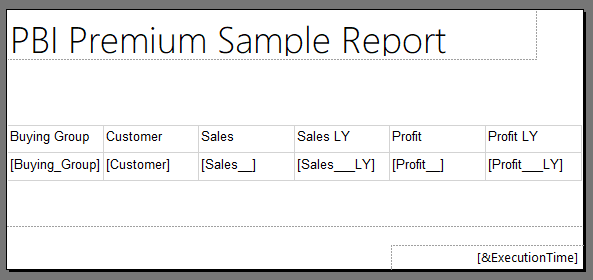
5. After the data is available, you need to layout your report. This step should feel familiar to anyone who has worked with SQL Server Reporting Services (SSRS) Report Builder. In this example, we built a simple table and added columns from our dataset to it.
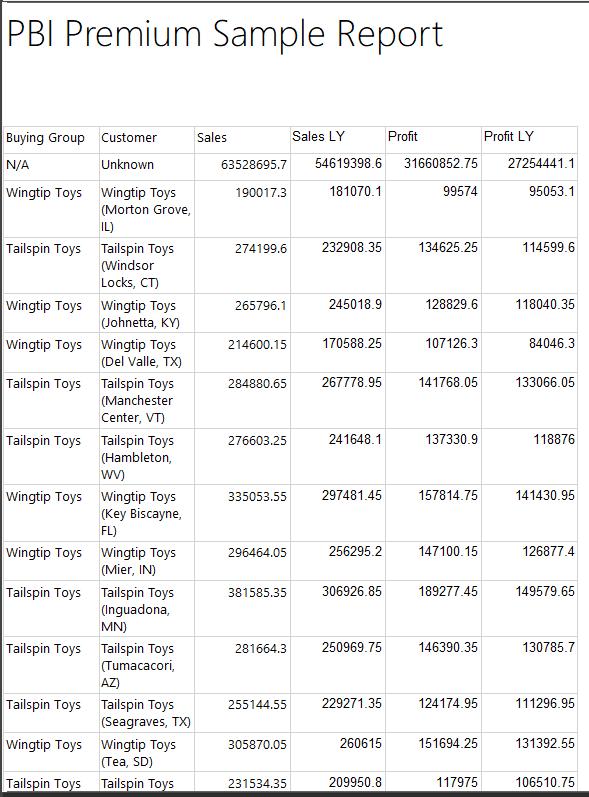
6. Test the report on the desktop by clicking the Run button from the Home ribbon.

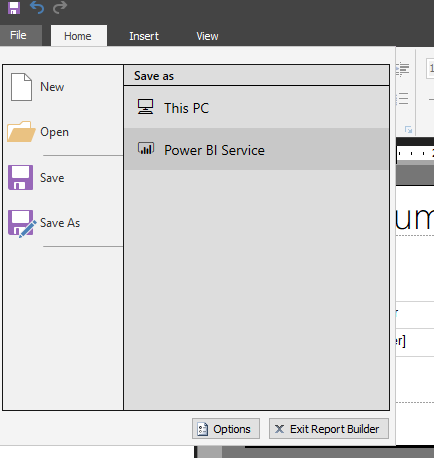
7. Now that the report is working, publish it to Power BI service. To do so, use File → Save As → Power BI Service.
Alternatively, you can publish to an on-premise Power BI Report Server which is similar to a SSRS server. Power BI Report Server contains only a subset of Power BI service features. An organization level Power BI Premium license is required for Power BI Report Server. This example focuses on Power BI service steps.
NOTE: Premium workspace enforcement happens at this point. You will only be able to save this RDL formatted report to a premium workspace with P1-3 or A4-6 capacity assigned.

8. After its published, you can run the paginated report in Power BI service.
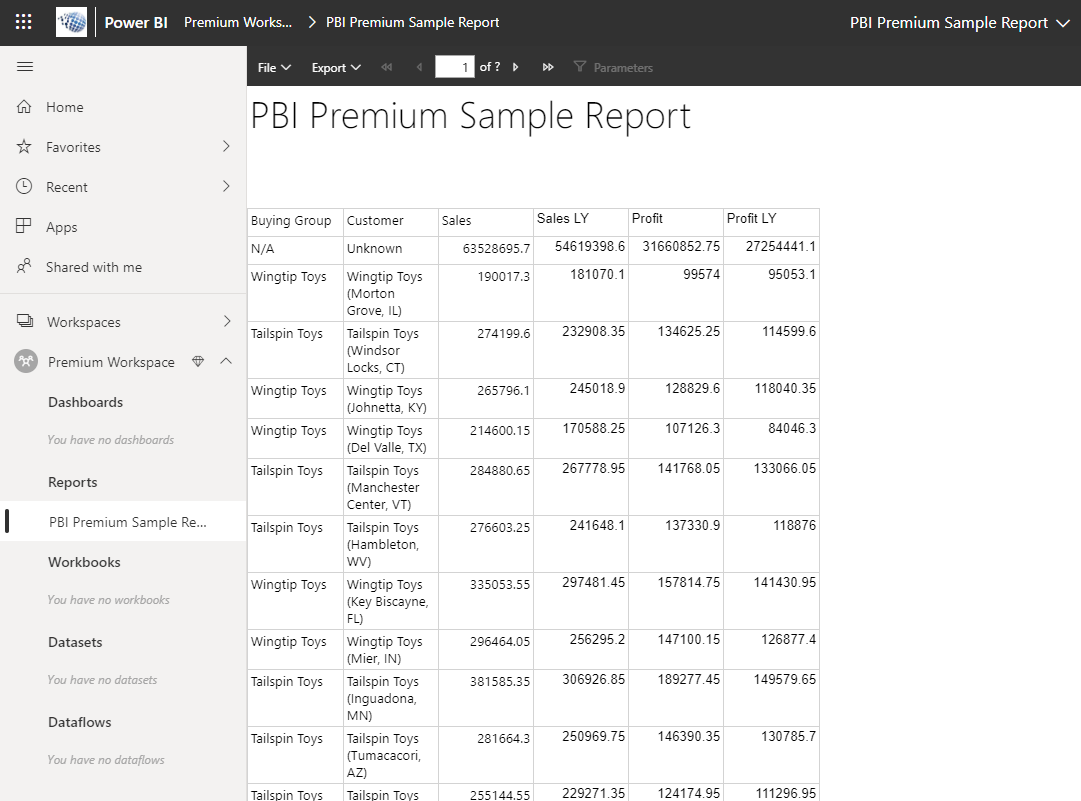
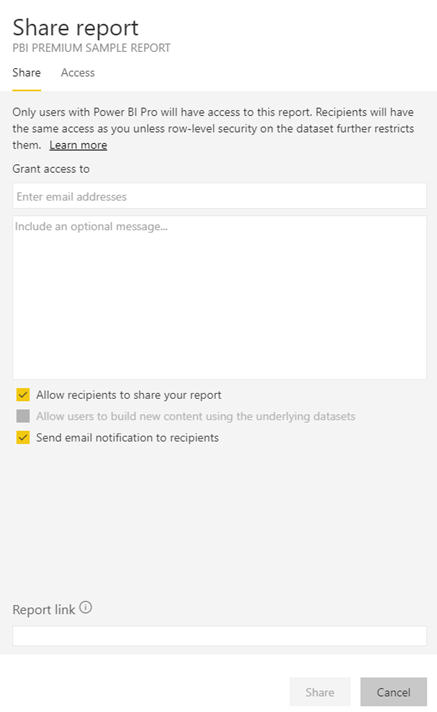
9. You can share this published report with others, who can view it in Power BI service using user accounts or security groups.
10. Lastly, you can setup email subscriptions to this report for yourself and others.
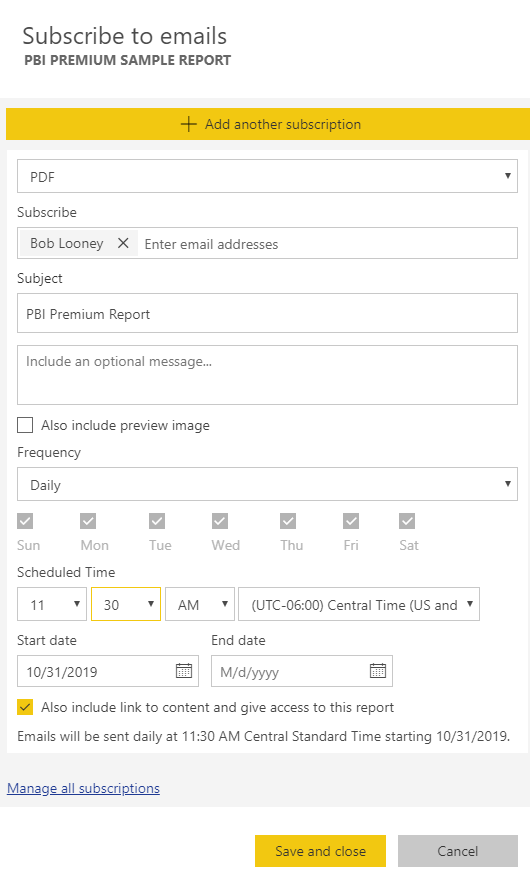
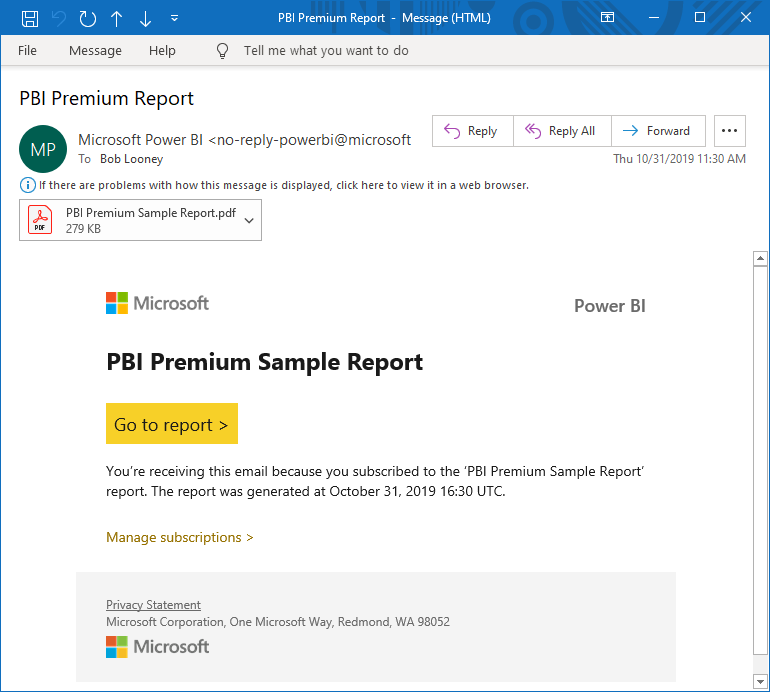
When delivered, the PDF report will be attached.
Summary
If your organization is looking to move away from on-premise SSRS, you can now leverage Power BI service with premium capacity to run your RDL formatted reports.
Looking for help with your BI system migration or migrating reports and dashboards to the cloud? Contact Senturus, the BI migration experts.